Travel budgets can be based on a number of different assumptions, such as a fixed amount per month or based on a specific job function.
This example will walk through how to create a travel expense based on the job title of Sales Rep.
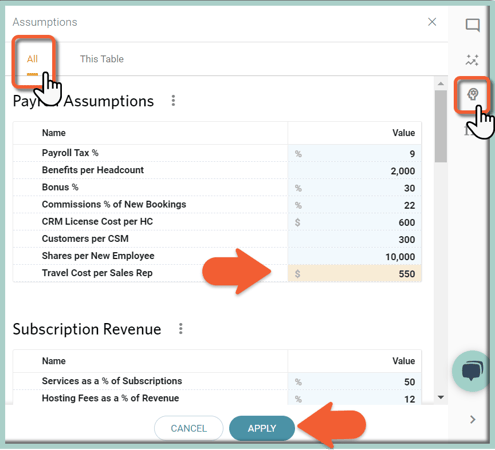
Step 1: Define the Assumption as Travel Cost per Sales Rep
Settings ⚙️ > Assumptions > Manage Tables > Add Assumption Table* > Name the table OpEx or Payroll Assumptions > + Add Assumption for Travel Cost per Sales Rep
*If there is already an OpEx or Payroll Assumption Table configured, an additional table should not be created
Step 2: Populate the Assumption in the Plan
Plan > Assumptions > All > Populate the table and Save
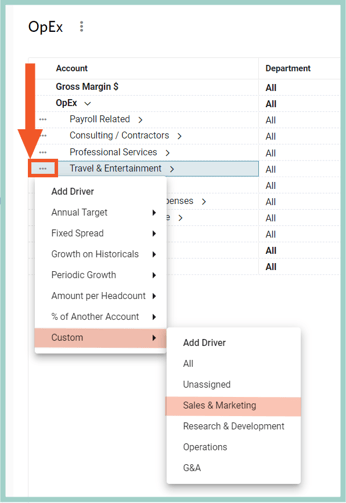
Step 3: Add Travel Cost per Sales Rep Driver
Navigate to OpEx and select the appropriate Expense GL Account (here: Travel & Entertainment) > click on the . . . > Add Driver > Custom > Sales & Marketing Department
Step 4: Populate Driver Inputs
Driver Name: Travel Cost per Sales Rep
Pro Tip: Naming the driver Travel Cost per Sales Rep will allow you to filter the OpEx Driver table and so long as "Travel" is the beginning of each of the travel drivers, the table will be easier to sort.
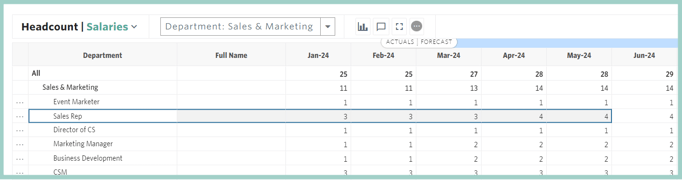
Input 1: Data Element as Headcount Cumulative #, Department: Sales & Marketing, Role: Sales Rep
fx: x
Input 2: Data Element as Assumptions, Assumptions Set: Payroll Assumptions and Travel Cost per Sales Rep Assumption
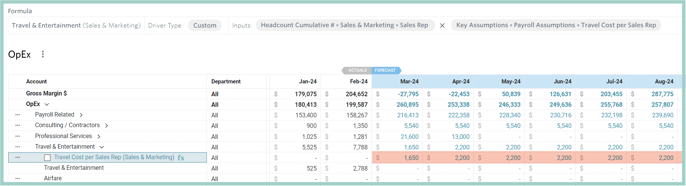
As you can see from the screenshot below, there are 3 Sales Reps in March 2024 and 4 Sales Reps in April 2024 and going forward:
Based on the above Sales Rep Headcount, you can see that Travel & Entertainment expenses are $1,650 (3 Sales Reps x $550) in March 2024 and $2,200 (4 Sales Reps x $550) in April 2024 and later: