Planning for future fixed asset additions is done using a special type of driver specifically built for Capital Expenditure. In addition to the depreciation forecast for planned new capital expenditures, the depreciation on existing assets needs to also be incorporated into the plan. This article contains 6 steps to configure your Jirav account to plan for both new & existing assets using a Custom Table and CapEx Drivers.
- Step 1: Define Custom Table for Capital
- Step 3: Add Drivers for Existing Depreciation
-
Step 4: Add Drivers to Link Existing Depreciation to the Financial Statements
- Step 5: Plan for CapEx Additions ($)
- Step 6: Review
Step 1: Define Custom Table for Capital
This Custom Table will give you visibility into additions as well as the associated depreciation and links to the financial statements.
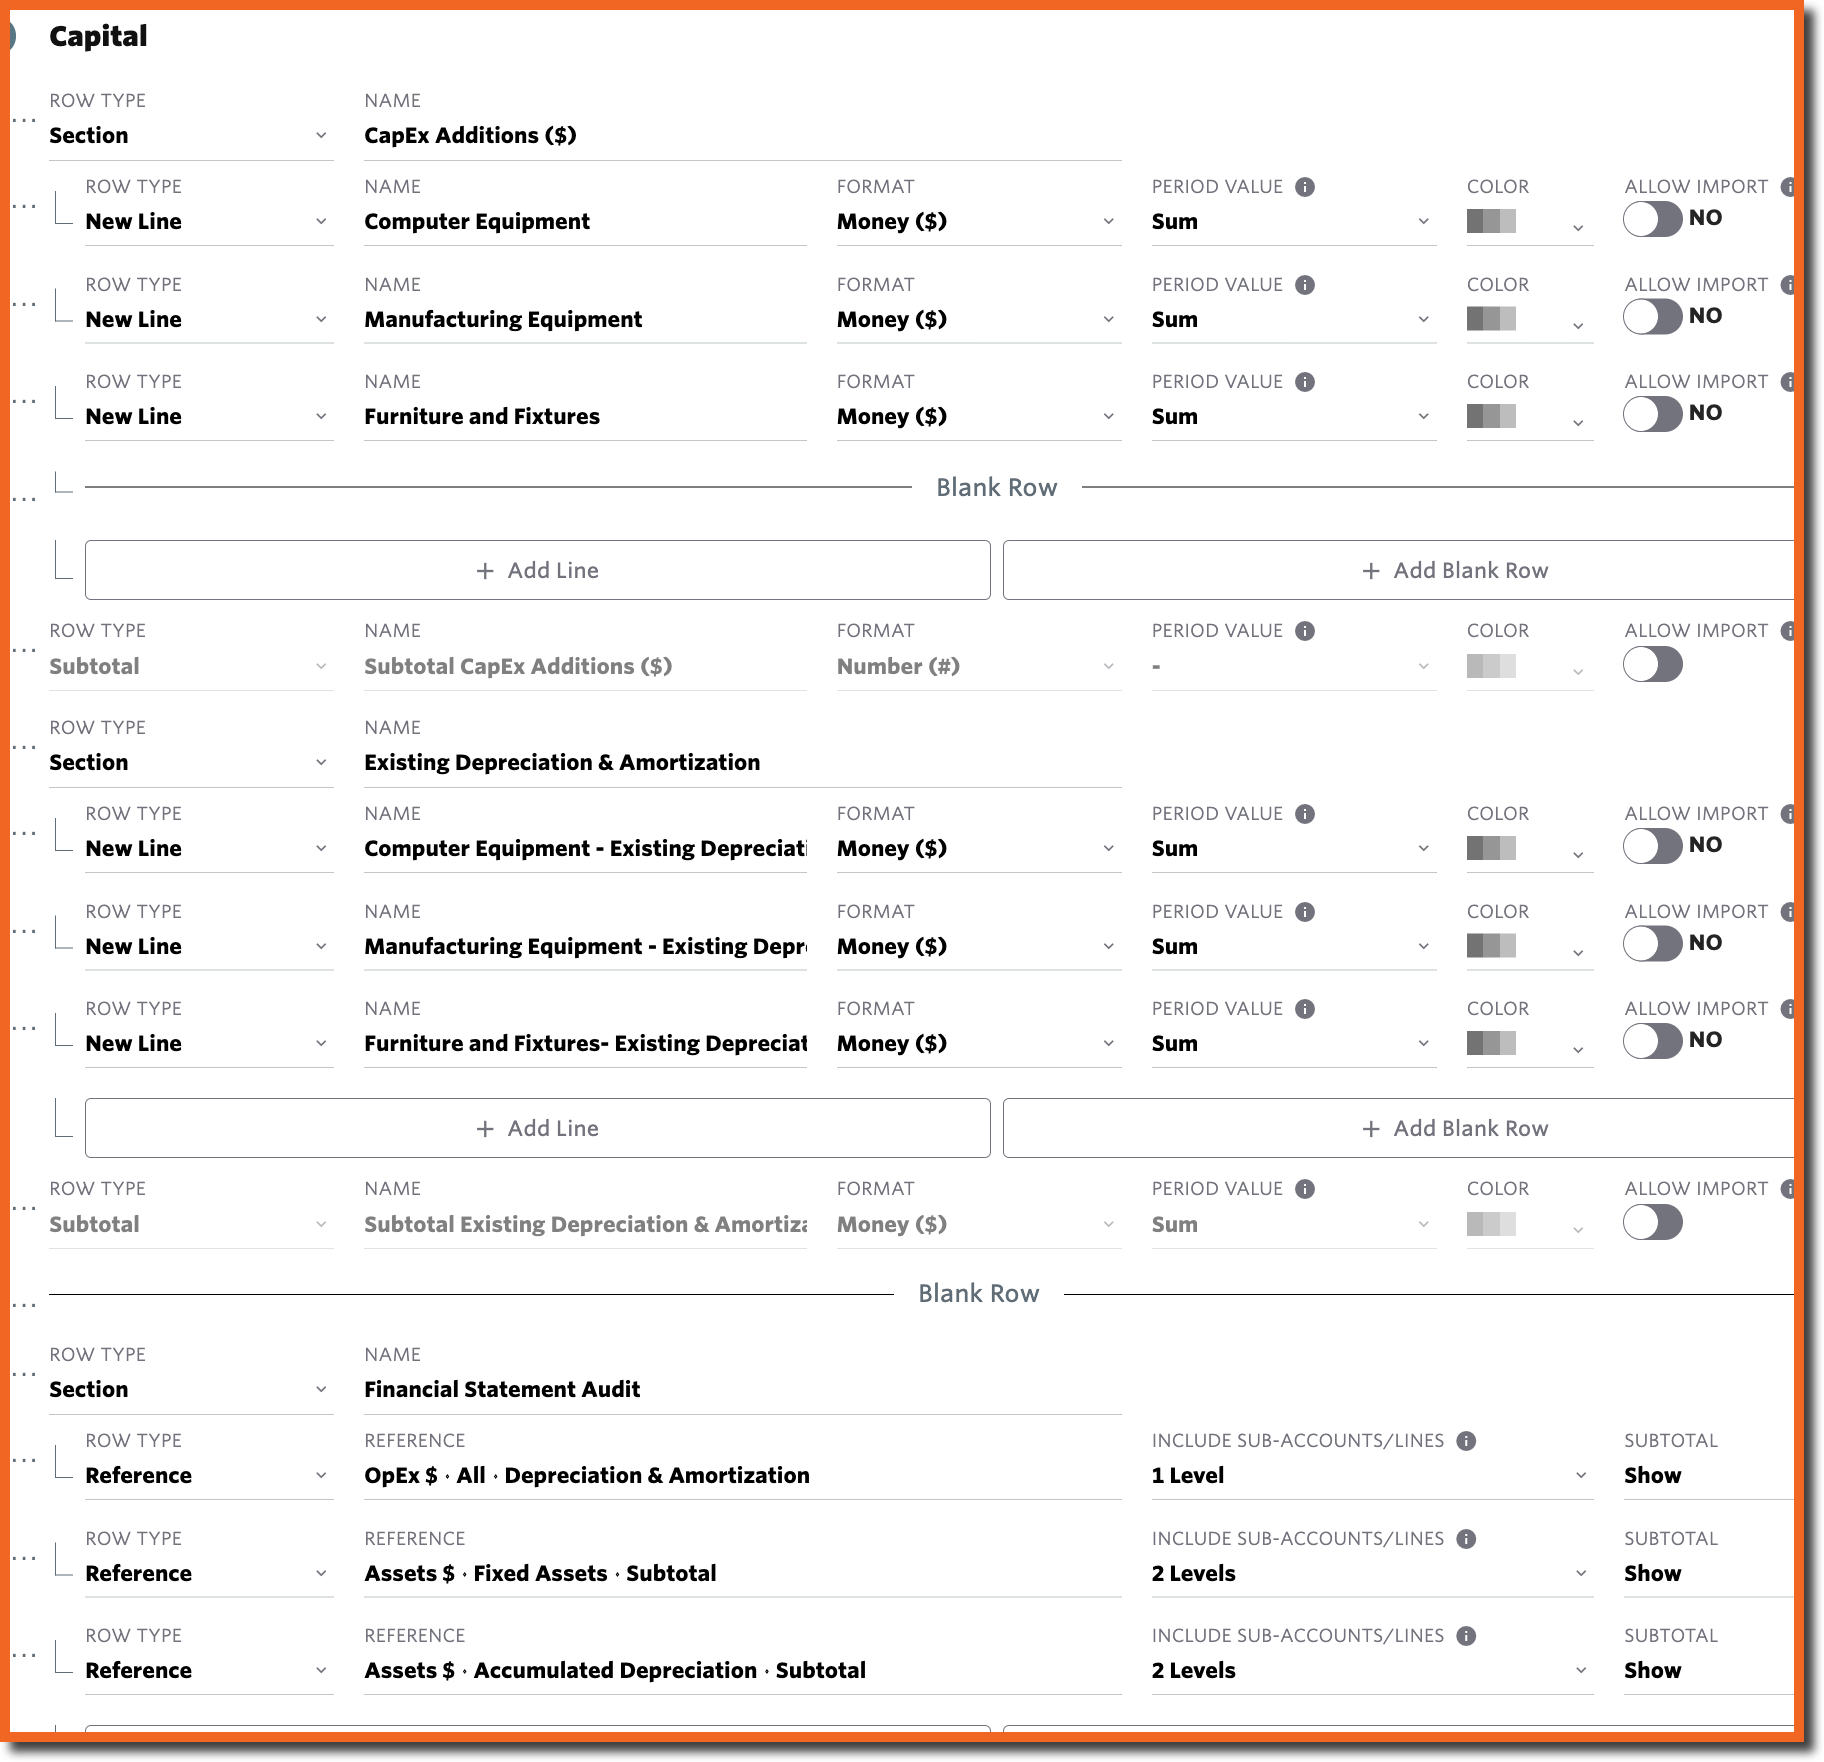
Go to Settings ⚙️ > Custom Tables > Select the "+" icon to add a new Custom Table and name it Capital. Then select + Add Line to create Sections, New Lines, and Reference Rows similar to the ones below.
- Section: CapEx Additions ($) - This section should include a New Line for each Asset Class you plan for
- Section: Existing Depreciation - This section should also include a New Line for each Asset Class you plan for
- Section: Financial Statement Audit - This section should include a Reference row for P&L Depreciation, BS Fixed Assets and BS Accumulated Depreciation
Step 2: Add Drivers for Planned CapEx Additions
These CapEx Drivers will calculate planned capital expenditures on the Balance Sheet and the associated planned depreciation on the P&L and Balance Sheet.
There are two Drivers associated with CapEx, one to define the characteristics of the asset to be purchased and a 2nd to trigger when the asset should be purchased.
- Go to Plans 📈> Drivers > Prepaid & CapEx Assets > + Add Asset and add a row for each Asset Class that was defined in the Custom Table in Step 1
- Name=Asset Class
- Asset Account=Fixed Asset account from Balance Sheet
- Asset Contra Account=Accumulated Depreciation account from Balance Sheet
- Expense Account=Depreciation account from the P&L
- Expense Department=Depreciation Department from the P&L
- Amort Period=Useful life of the asset entered in months
- Asset Cost=1 (The Asset Cost will be pulled in from our Custom Table in the 2nd Driver)

- After adding the Prepaids & CapEx Assets Drivers, from Plans 📈> Drivers > CapEx > + Add Driver and add a Driver for each Asset
- Name=Asset Class
- Asset=Asset as defined above
- Output Type=Incremental
- Driver=Reference to Custom Table Additions lines added in Step 1

Additional Resource: CapEx Assets & Drivers Documentation
Step 3: Add Drivers for Existing Depreciation
The Drivers added in Step 2 will calculate the depreciation on new CapEx Additions. The depreciation on existing assets also needs to be incorporated into the plan. This method assumes that future depreciation on existing assets will be equal to the last month of actual depreciation. This is done by creating two drivers for each asset, one to calculate the actual change in deprecation in actuals and a 2nd to pull that amount into the forecast.
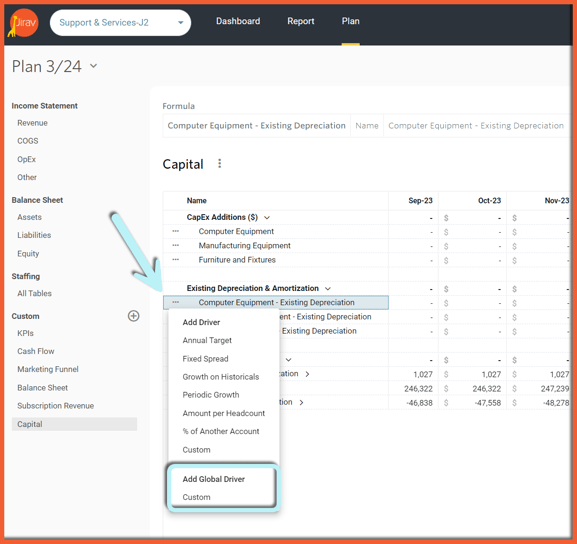
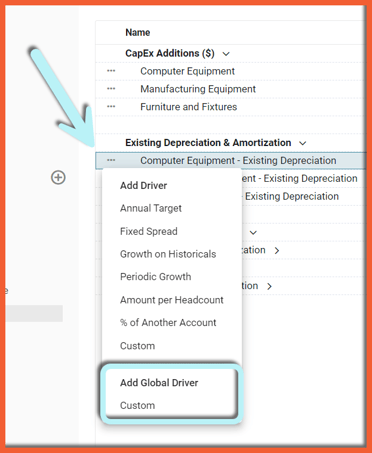
- Create Global Driver to Calculate Actual Depreciation: Go to Plans 📈 > Custom: Capital and add a Global Driver to each Existing Depreciation line that calculates the change in accumulated depreciation for the associated asset in Actuals
- Input 1: Accumulated Depreciation Furniture and Fixtures (Range: Last Month)
- fx: -
- Input 2: Accumulated Depreciation Furniture and Fixtures (Range: This Month)
- Dates: Min Date to Cutover Date


- Create Plan Driver to forecast Existing Depreciation in the Plan: Go to Plans 📈 > Custom: Capital and add a Custom Plan Driver to each Existing Depreciation line that pulls the actual depreciation in the future forecast periods
- Input 1: Output (Range: Last Month)
- fx: *
- Input 2: Constant 1
- Dates: Cutover Date to Max Date

After this step is completed, your Capital Custom Table should look similar to the one below.

Step 4: Add Drivers to Link Existing Depreciation to the Financial Statements
Depreciation on new capital expenditures was completed in Step 2. We now need to link the existing depreciation calculated in Step 3 to the Balance Sheet and P&L.
- Create Balance Sheet Driver for Existing Depreciation: Go to Plans 📈 > Drivers > Balance Sheet > + Add Driver for each Asset Class
- Output=Balance Sheet Accumulated Depreciation - Driver Decrease
- Driver=Existing Depreciation from Custom Table

- Create an Expense Driver for Existing Depreciation: Go to Plans 📈 > Drivers > OpEx or Other Income and Expense > + Add Driver to Depreciation
- Output=P&L Depreciation
- Driver=Total Existing Depreciation from Custom Table

Step 5: Plan for CapEx Additions ($)
CapEx Additions can either be input as a $ amount per month or with a driver. For example, you might create a driver for Computer Equipment that multiplies New Headcount by an Assumption for Computer Equipment per New Hire.

Step 6: Review
Now that you have added all of the drivers and input a forecast for CapEx Additions, review the Financial Statement Audit section to visualize how the CapEx forecast is impacting the Balance Sheet and P&L.
