Jirav's foundation is built on your accounting data. The Sage Intacct integration utilizes a web service user in Sage Intacct which must be set up prior to establishing the connection in Jirav.
Article Contents
Initial Connection Instructions
If you used a Quick Start Template to set up your Sage Intacct account, Jirav can automatically identify the section for each account in the chart of accounts and you can proceed with the initial connection instructions. If you did not use a Quick Start Template during the initial Sage Intacct setup, you'll need to complete a one-time setup to identify the section for each account in the chart of accounts as outlined in the no-template account instructions before establishing the initial connection.
Import the chart of accounts, account balances, and optionally, a department structure from Sage Intacct following these steps.
Step 1: Create a “Web Services Authorization”
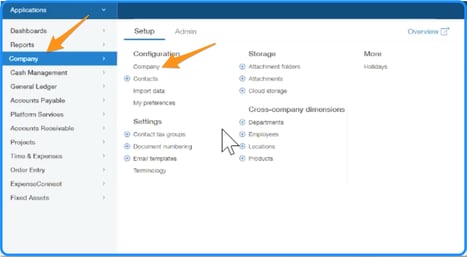
- From Sage Intacct, navigate to Company > Setup > Company.
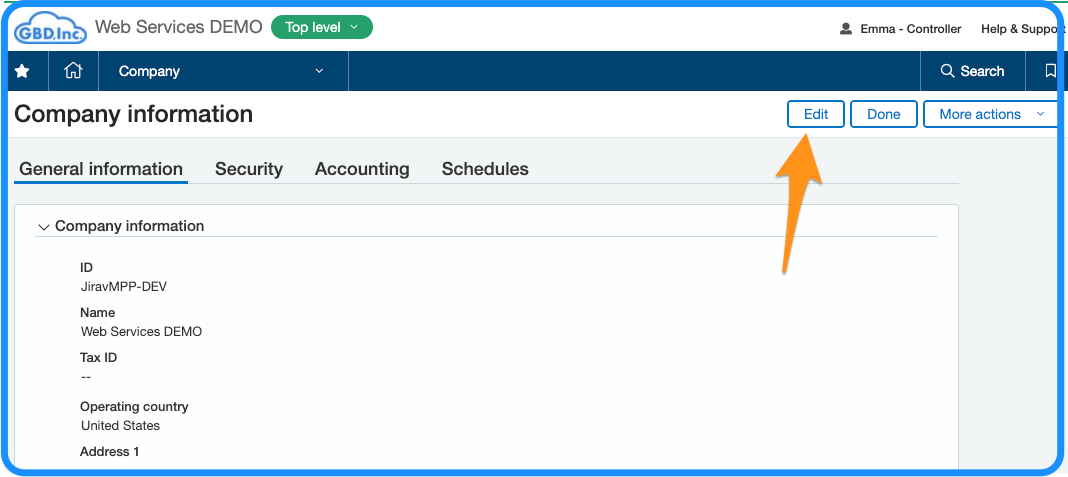
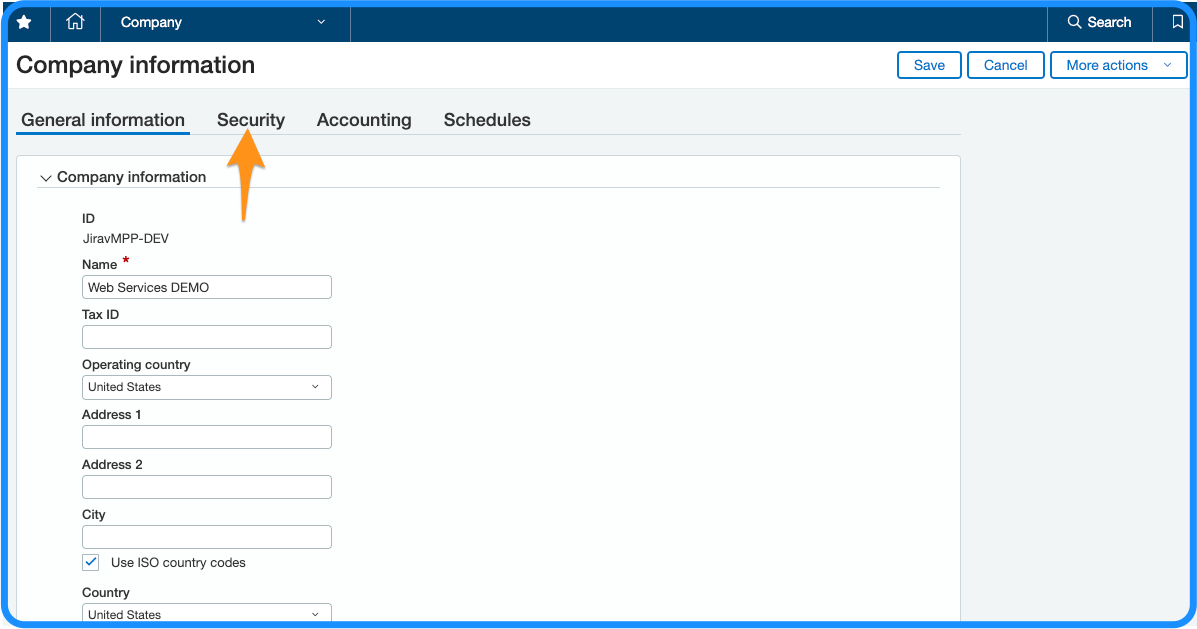
- Select Edit in Company information and navigate to the Security tab.
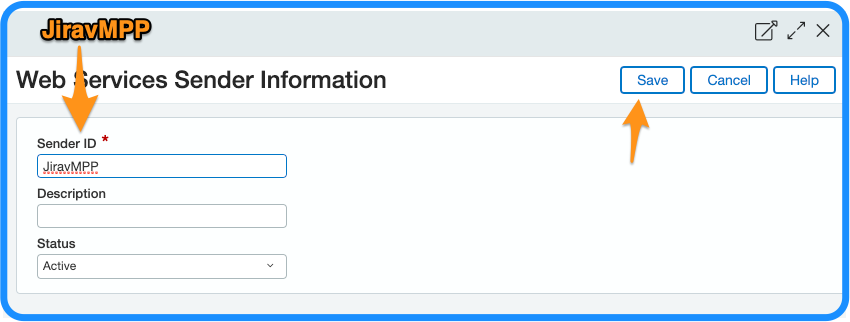
- Select Add from Security, populate the Web Services Sender Information as follows and Save.
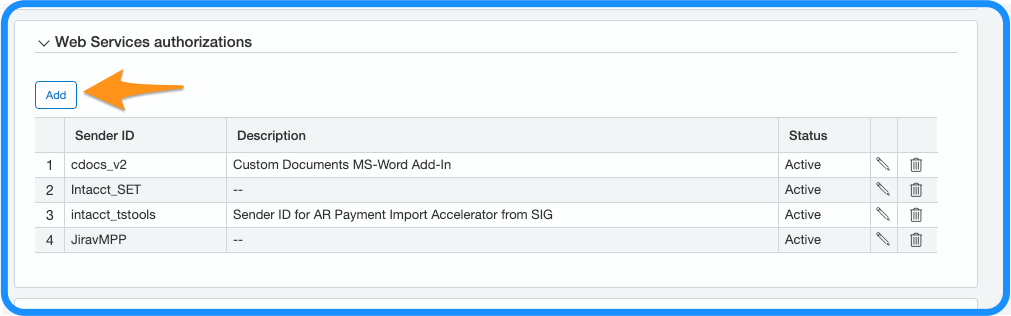
Sender ID: JiravMPP
- Description: Optional - can be left blank
- Status: Active
Be Aware:
The sender ID needs to match exactly and is "JiravMPP". Entering in a different Sender ID will cause the integration to fail.
Step 2: Create a “Jirav App Role” in Sage Intacct
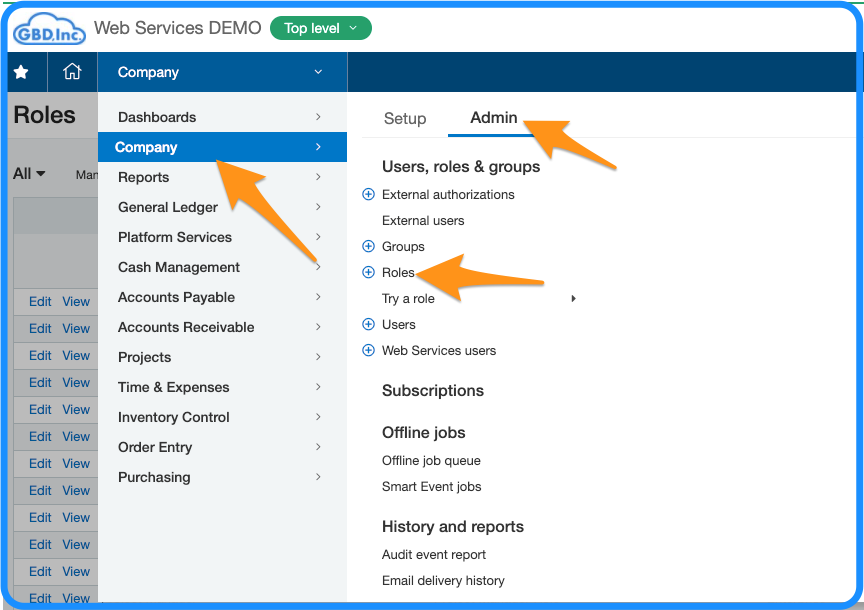
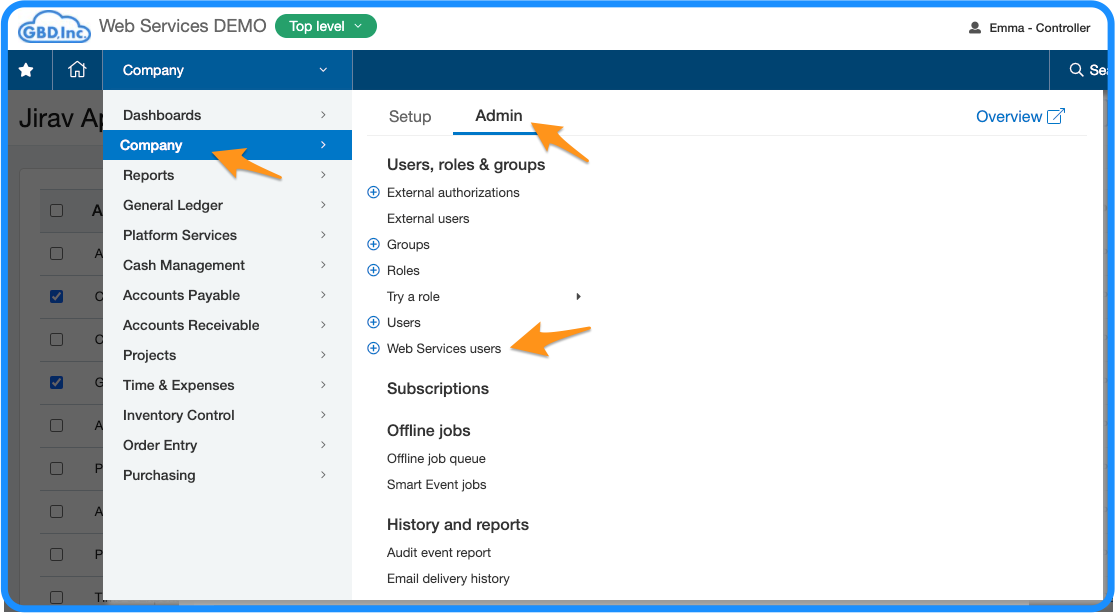
- From Sage Intacct, navigate to Company > Admin > Roles
If you are not seeing the roles option when you are in the view pictured below, go to Company -> Setup tab -> Configuration -> Company within Sage Intacct. This is where you can select Role-Based as the permissions type. You should be able to continue with the steps below after enabling this.
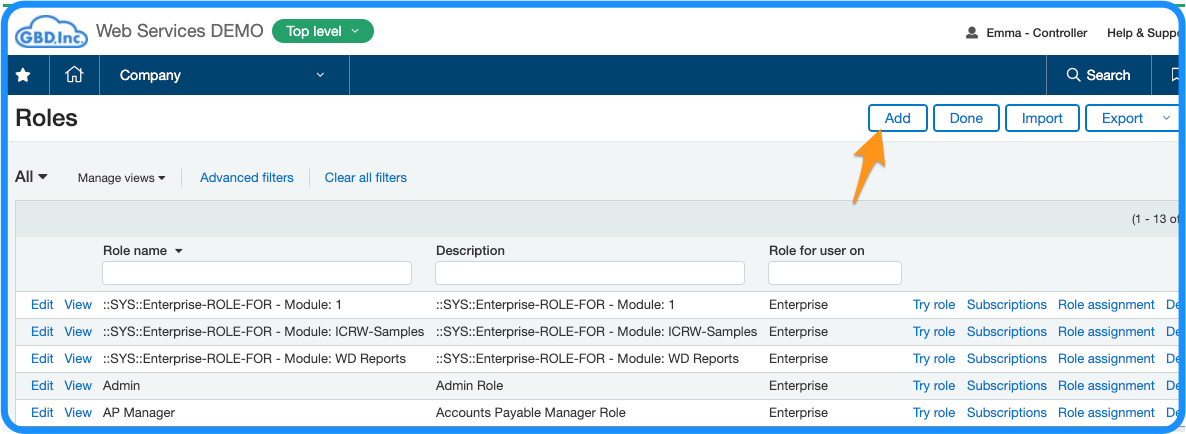
- Select Add from Roles, populate the Role Information as follows and Save.
- Name: Jirav App Role
- Description: Optional - can be left blank
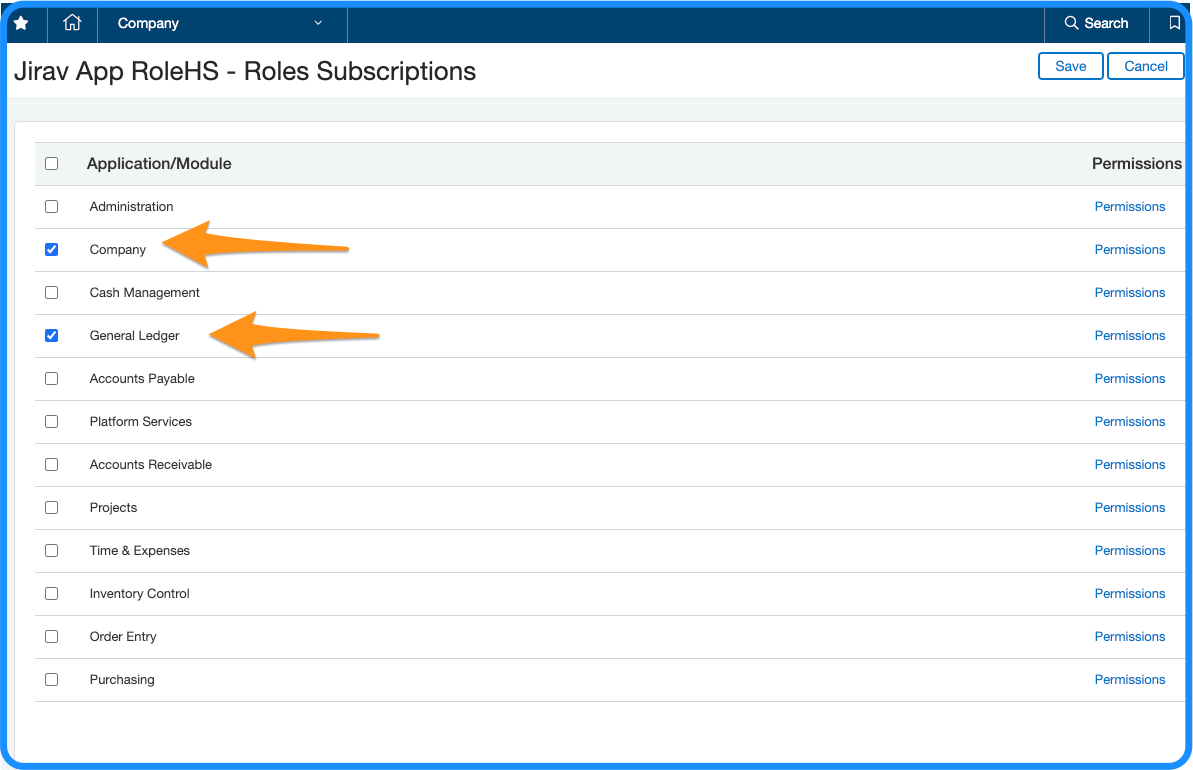
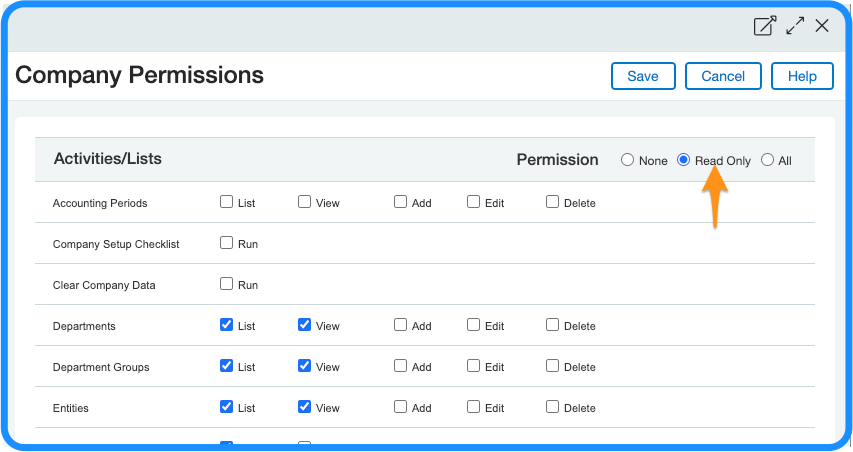
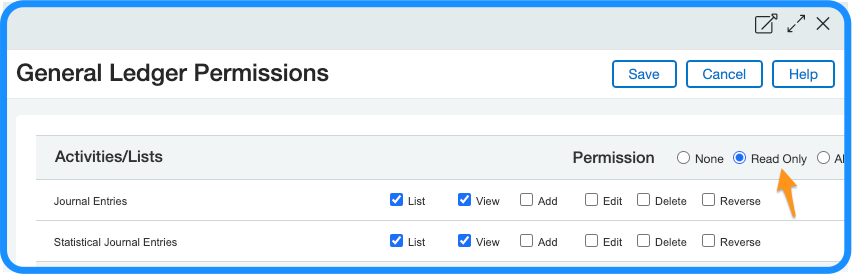
- After saving the Role, grant the role permission Read-Only access to the Company and General Ledger Application/Modules and Save.
Once you select "Read-Only" Sage Intacct will auto populate the permissions - there is no need to further customize the access level.

Step 3: Create a “Web Services User”
- From Sage Intacct, navigate to Company > Admin > Web Services Users.
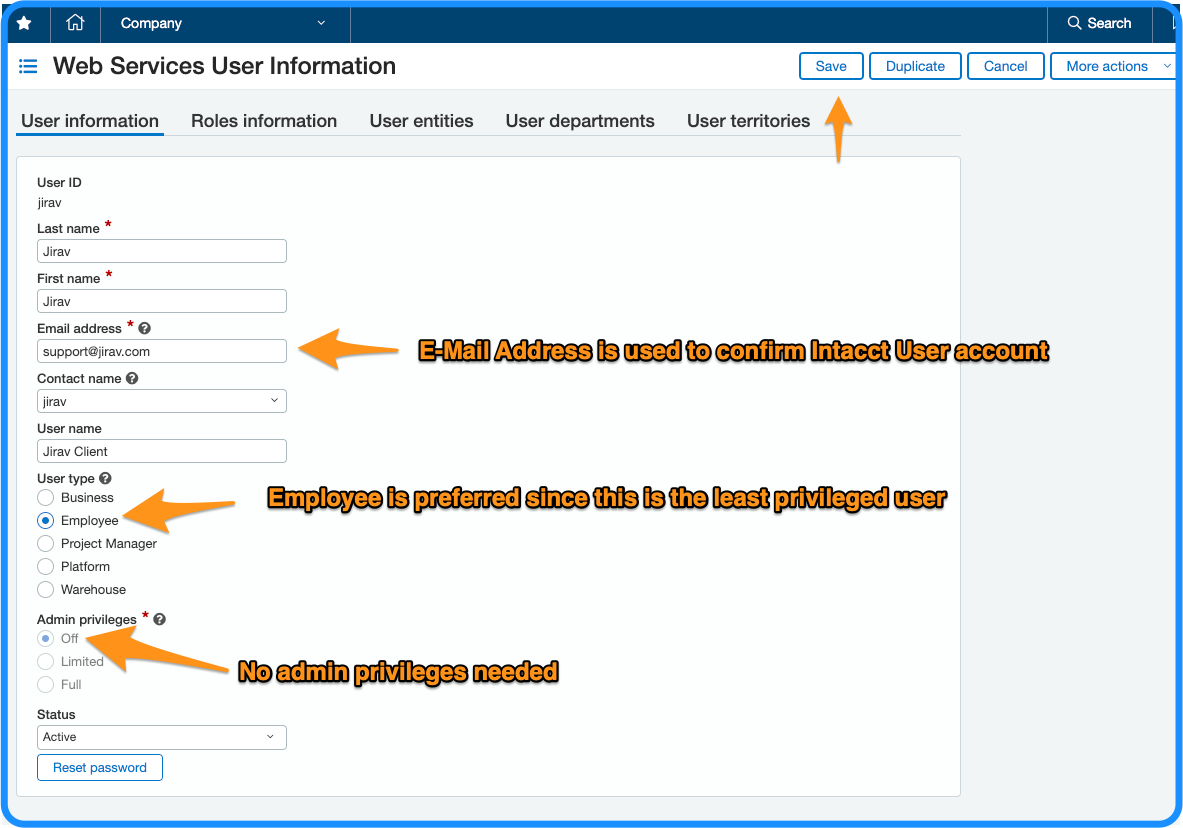
- Select Add from Web Services Users, populate the Webs Services User as follows and Save.
- User ID: Jirav
- Last Name: Jirav
- First Name: Jirav
- Email Address: Enter the E-Mail address of whoever within your company will administrate importing data from Sage Intacct to Jirav. It is required to enter a real email address as this is how Sage Intacct will validate the user account.
- Contact name: Jirav
- User name: Jirav Client
- User type: Employee is recommended as this is the least privileged user type
- Admin privileges: Off
- Status: Active
- After creating the Sage Intacct Web Services User, you will receive an email containing the Company ID, User ID and User Password required by Jirav in Step 5. Save this email as it is required to complete the integration to Jirav.
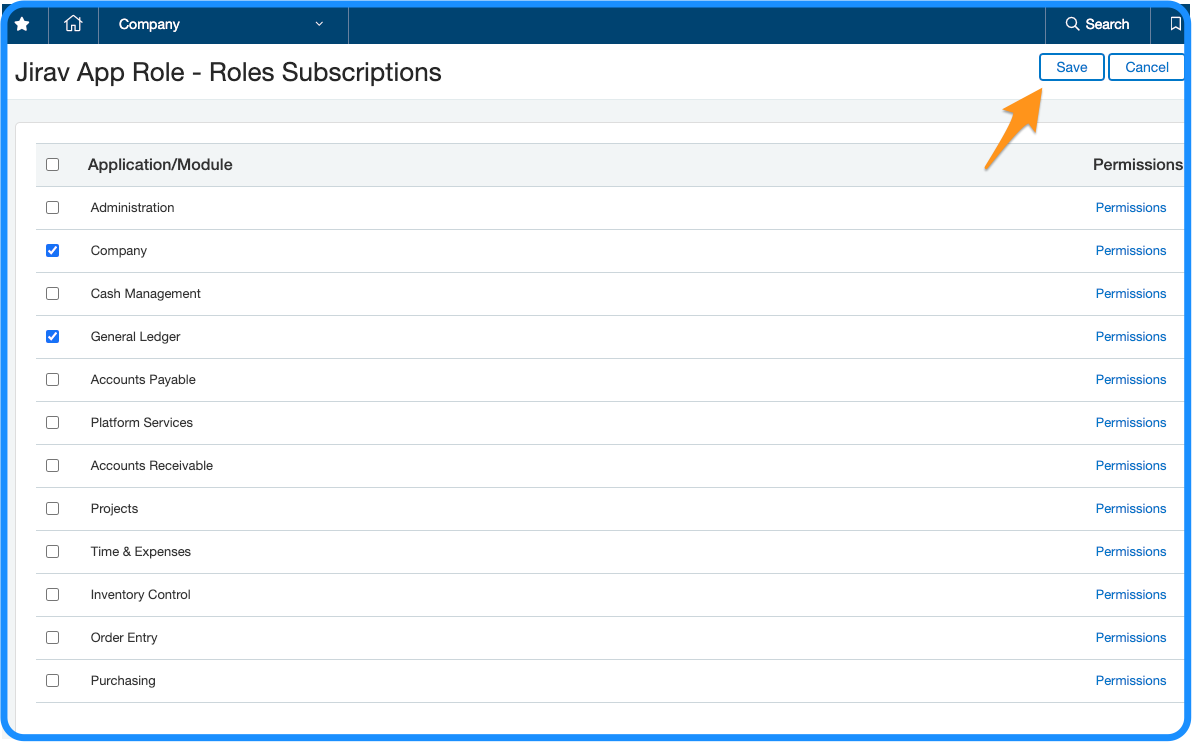
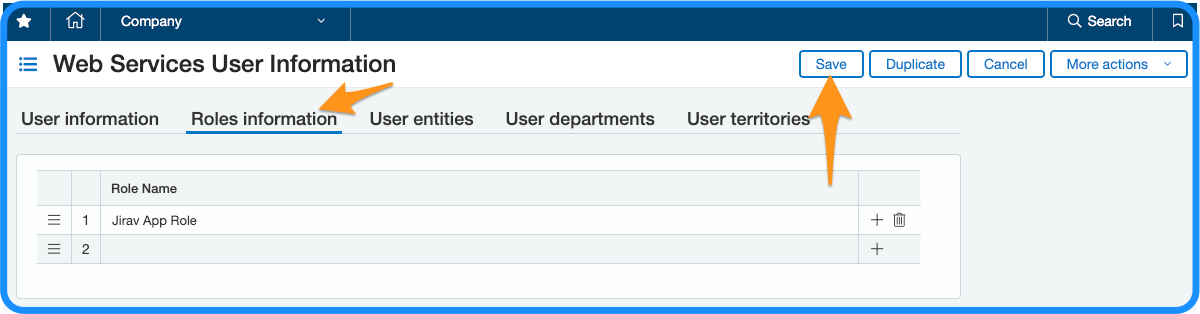
- Navigate to the Roles information tab of the Web Services User Information, add the Jirav App Role to the user and Save.
When setting up most integrations, you will not need to do any additional configuration in this screen.
If you only want to import data from a specific entity, you can select the "User Entities" tab and then filter the entities accordingly.

Step 4: Enable Web Services in Intacct
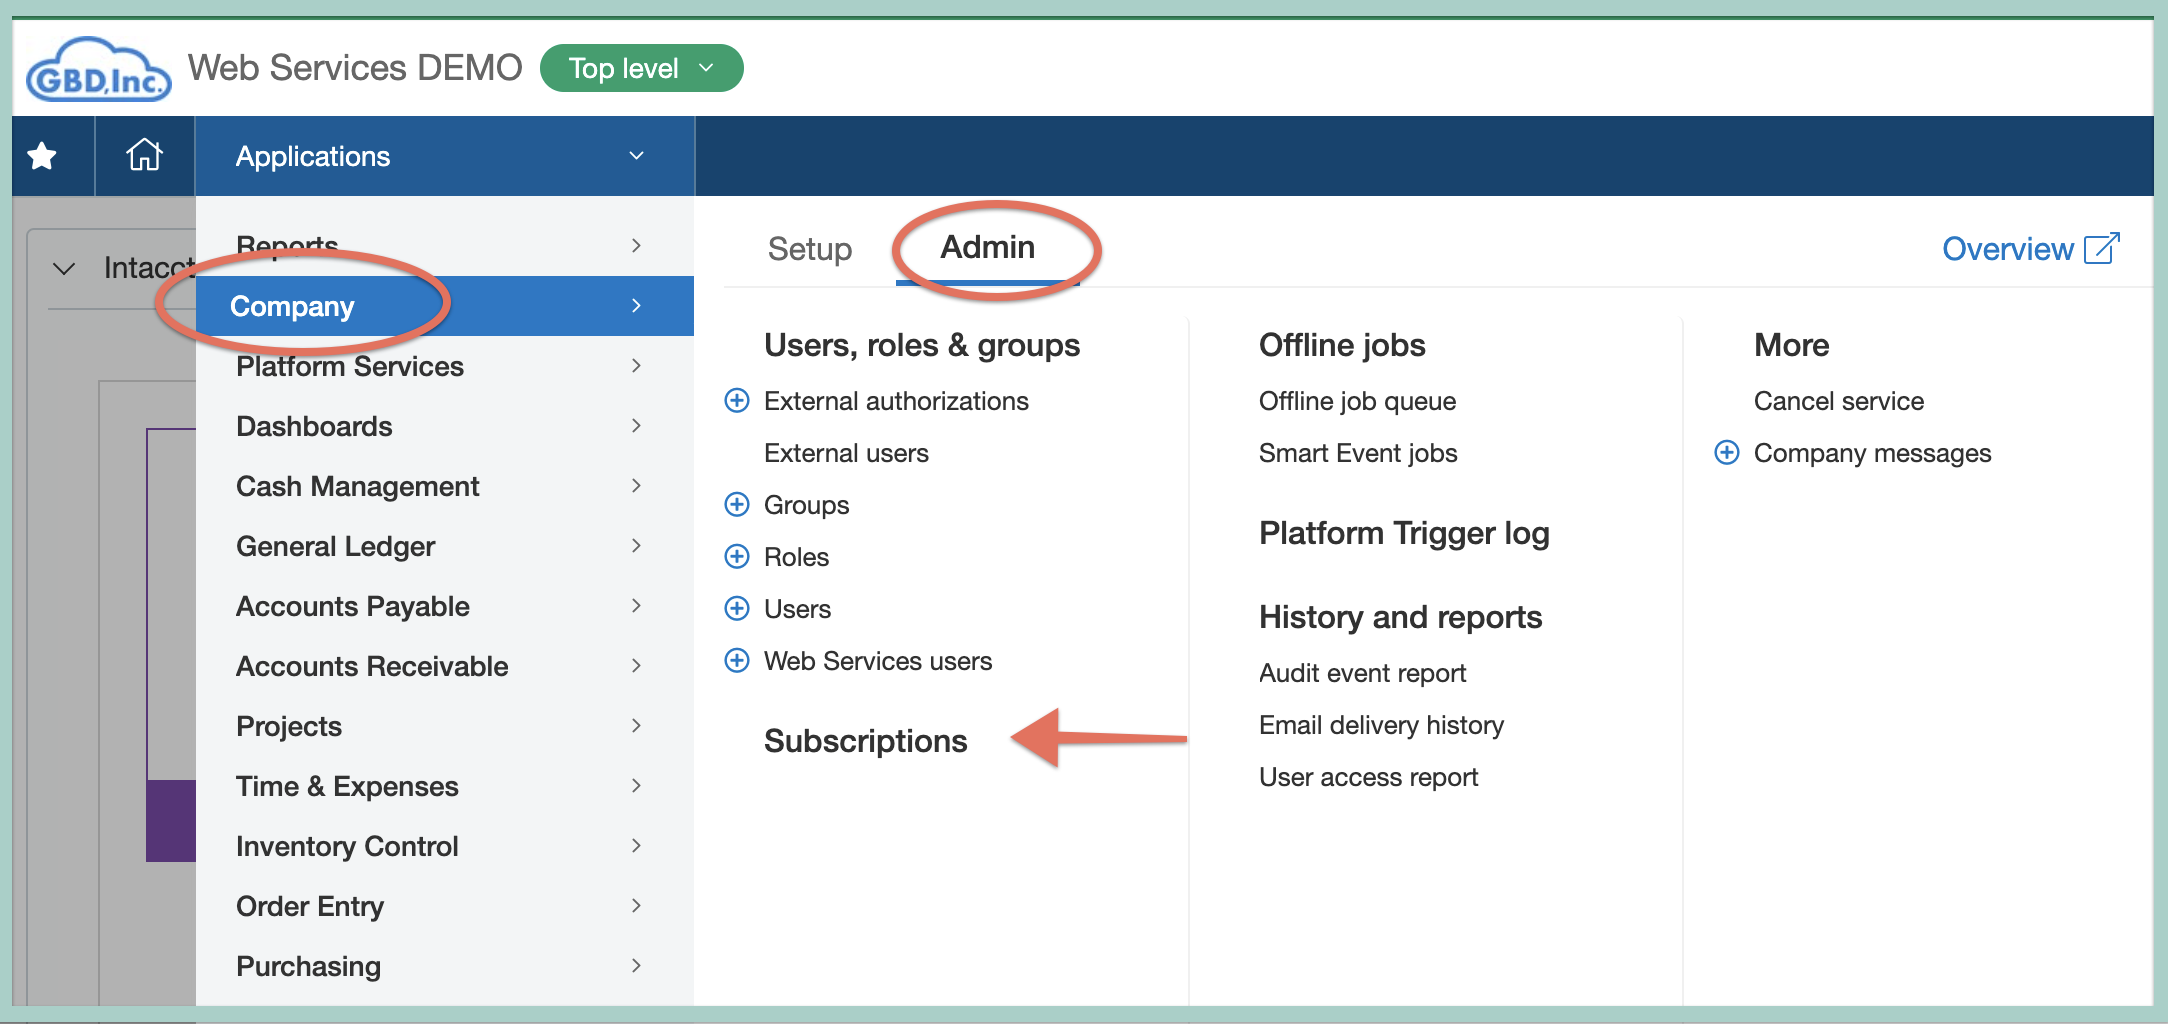
- From Sage Intacct, navigate to Company > Admin > Subscriptions.
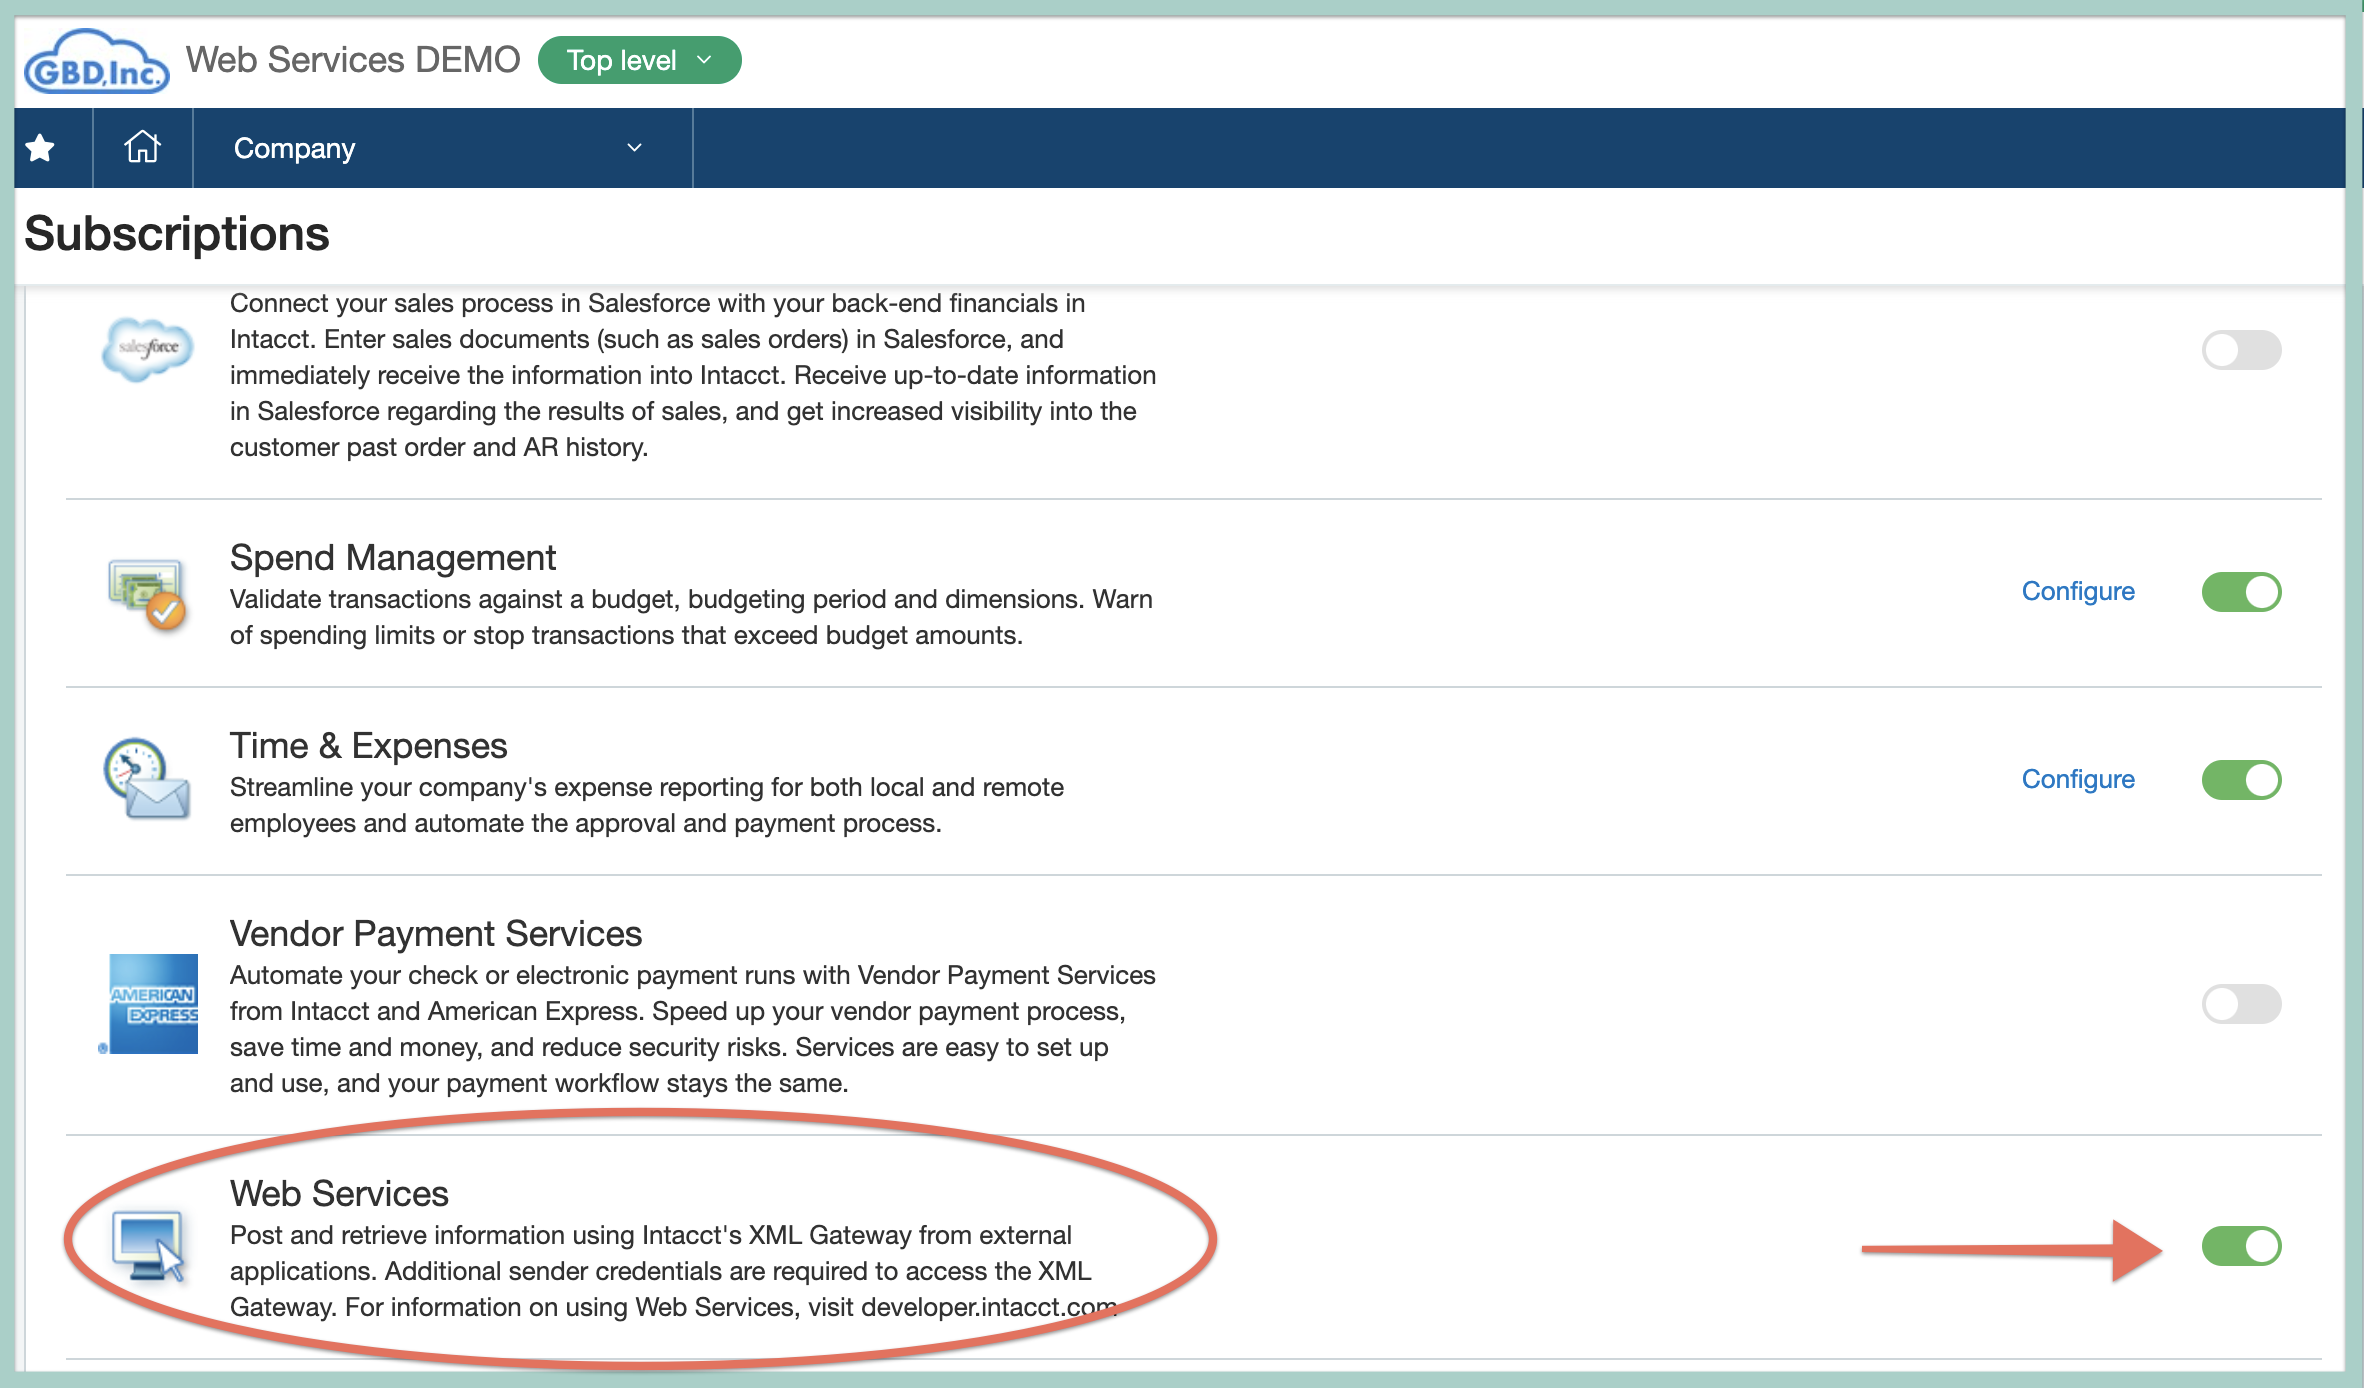
- From the Subscriptions area, enable Web Services.
Step 5: Connect your Sage Intacct account to Jirav
- Now that the Web Services user is configured in Sage Intacct, login to your Jirav account and navigate to Settings ⚙️ > Integrations.
- Locate Sage Intacct in the Actuals: Accounting section and click Connect.
- You will then be prompted for your Sage Intacct credentials. Enter the Company Id, User Id and User Password from in the email sent by sage Intacct after completing Step 3 above and click OK.
- Review the date range prompt and click Import.


After completing these steps, you will receive a confirmation indicating that the data import was successful. This confirms the successful establishment of the connection, and you will see the Connect button replaced with an Import button.
You can now start exploring dashboards, reports, and plans!
Did you know?
The integration between Sage Intacct and Jirav will run automatically every night for the current and previous months. To refresh the data immediately, or to reimport a historical period, navigate to Settings > Integrations and click the IMPORT button.
Jirav & Intacct Departments
Jirav Users have the option to bring in the Department or Location dimension when connecting to the Sage Intacct form Settings⚙️> Integrations to plan, analyze, and report

To enable this feature, go to Settings ⚙️ > Departments and map the department values in the INTACCT column to their corresponding Jirav Departments by clicking in the white space to the right of the Jirav Department.
No-Template Account Instructions
Learn how to integrate Sage Intacct accounts that were not created using a QuickStart Template
If a Quick Start Template was used to configure your Sage Intacct account, Jirav is able to automatically identify which section each account belongs to within the Chart of Accounts and this step is not required.
However, if a Quick Start Template wasn't utilized during the initial setup of Sage Intacct, these steps provide a seamless method to categorize each account within the COA. This one-time setup ensures efficient mapping to sections within Jirav, facilitating successful importation of your Accounting data.
- Access Sage Intacct Account Groups:
Please note, there is no need to modify your existing account groups used for reporting purposes in Sage Intacct as an account can be part of more than one group.
- Within Sage Intacct, navigate to the General Ledger by opening the dropdown list beside the home icon and selecting "General Ledger".
- Under "Financial Report Structures", choose "Account Groups".
- Create Account Groups
Please note, only one Account Group can be mapped to each Section/Category within Jirav. Customization of the structure of your COA can be done within Jirav once the import is complete.
- Create an account group for each item listed below, ensuring "Accounts" is selected as the "Structure Type":
- jirav_revenue
- jirav_cogs
- jirav_opex
- jirav_other_income
- jirav_other_expense
- Jirav_bank_accounts
- jirav_other_current_assets
- jirav_other_assets
- jirav_fixed_assets
- jirav_long_term_liabilities
- jirav_equity
- jirav_current_liabilities
- jirav_retained_earnings
- Assign Accounts to Groups:
- Assign each account to their respective Account Group.
- Pro Tip: You can use Account Numbers or Names to assign ranges at a time.
- Every account, including inactive ones, must be assigned to a group for successful import.
- There can only be one account assigned to the jirav_retained_earnings account group.
- Configure Integration in Jirav:
- Follow the Initial Connection process outlined above in this article.
- After configuring the integration and entering credentials in Jirav, return to this step.
- Update Import Method in Jirav:
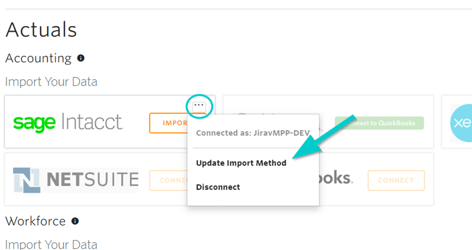
- In Jirav, navigate to Settings > Integrations.
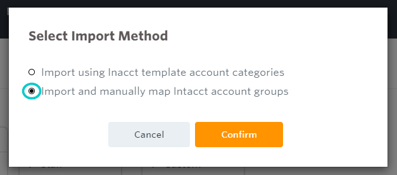
- Click on the ellipsis (. . .) in the top right corner of the Sage Intacct tile and select "Update Import Method".
- Choose "Import and manually map Intacct account groups" and confirm.
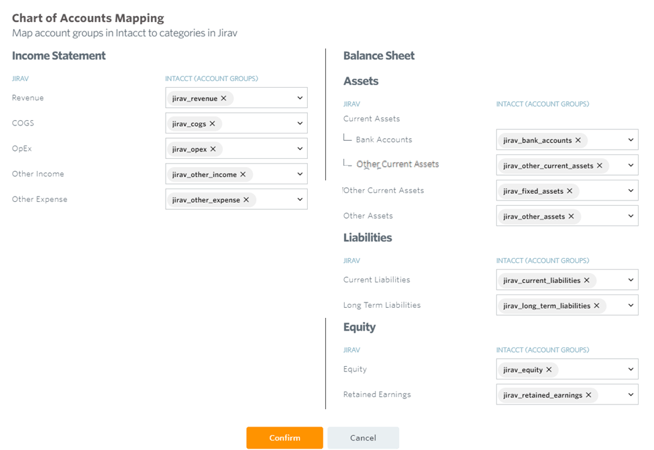
- Map Intacct Account Groups:
- Select your desired import time period.
- A pop-up will appear allowing mapping of Intacct Account Groups to corresponding sections/categories in Jirav.
- Ensure each group is correctly mapped; if not automatically populated, assign them accordingly.
Confirm and Import Data:
- Once all accounts are assigned to mapped Account Groups, click "Confirm" and import your data.

Helpful Hints:
- Using Departments is not mandatory - If your company does not currently utilize Departments, you can simply plan at the company level in Jirav
- Jirav currently only supports the Departments and Location dimensions from Sage Intacct
- Click here to learn more about Departments in Jirav
- Having trouble connecting? Please reference our Sage Intacct Troubleshooting article.