The CRM (SalesForce, Hubspot, Zoho, etc.) typically holds the current opportunities your sales team is working to close from the sales pipeline. This data can provide an accurate revenue forecast for the first few months of the plan but typically does not provide an accurate outlook past that. This article contains 3 steps to configure your Jirav model to incorporate your CRM forecast for the near term and a Quota-based Model for the long term.
- Step 1: Configure Custom Table to Hold CRM Data
- Step 2: Bring CRM data into the Jirav connected GoogleSheet
- Step 3: Update the Revenue Model to Consider CRM Data
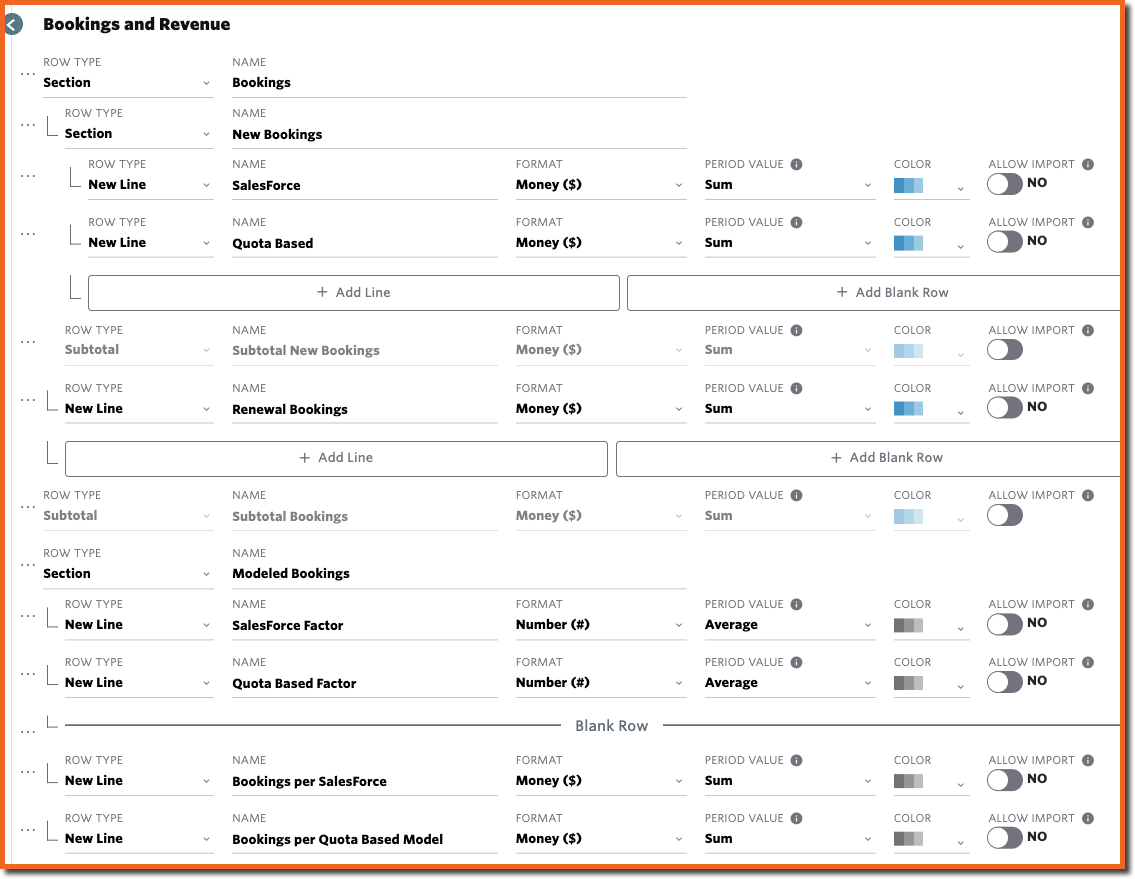
Step 1: Configure Custom Table to Hold CRM Data
The Custom Table will display the data imported from your CRM to Jirav. You can either use an existing Custom Table or create a new Custom Table for this. In this example, the existing Custom Table for Bookings and Revenue is used.
- Go to Setting ⚙️ > Custom Tables > select the "+" icon to add new Custom Table and name it "Bookings and Revenue". Then select + Add Line to create a new Section and New Lines similar to the below screenshot.
- After saving the new lines, add them to the connected Google Sheets by clicking the Export New Lines to G Sheet button.

Don't see an Export New Lines to G Sheet button available in your account? Click here to learn how to connect GoogleSheet to Jirav.
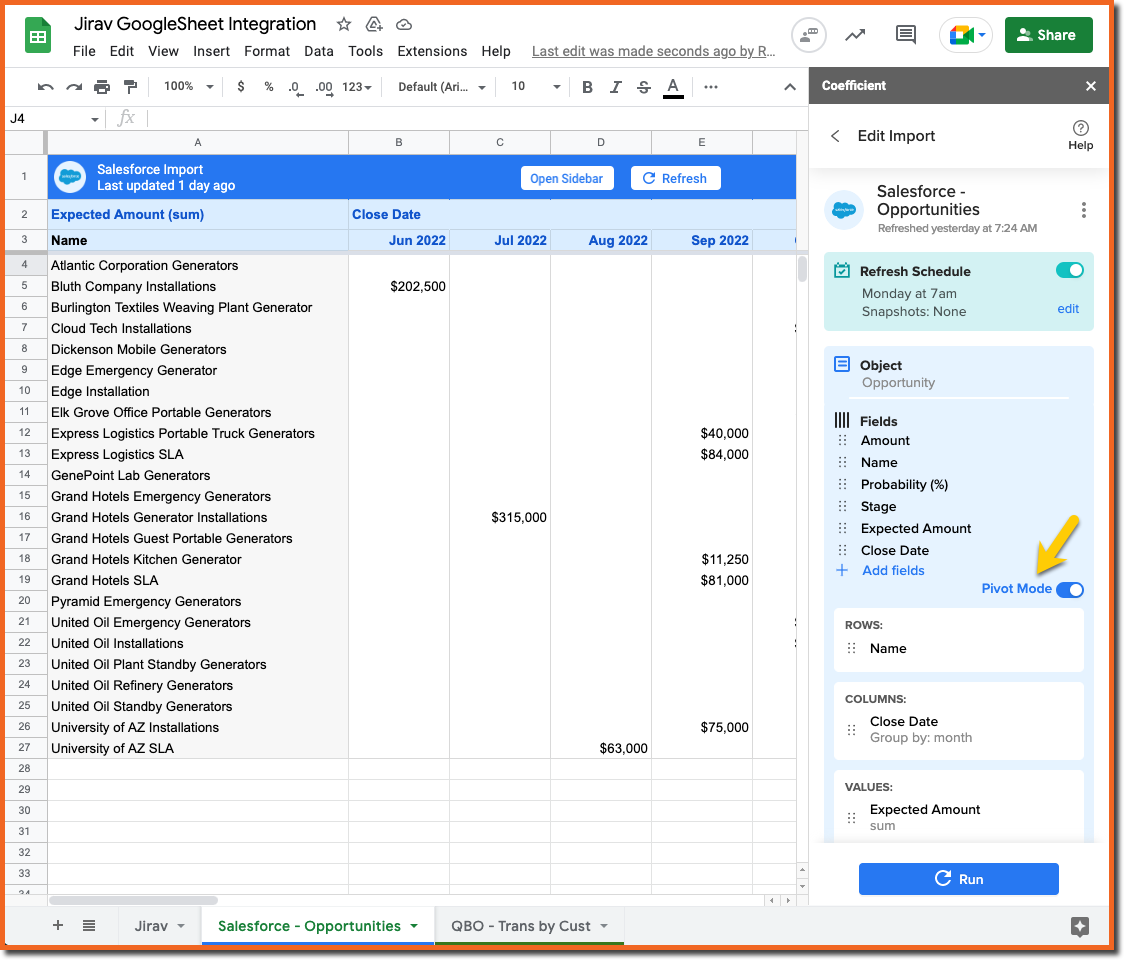
Step 2: Bring CRM data into the Jirav connected GoogleSheet
Jirav imports data from the far left tab of the GoogleSheet. In this step, we will put the CRM data in a separate tab using the JiravSync Coefficient to SalesForce integration, then link that tab to Jirav's connected tab.
- Go to Setup ⚙️ > Integrations and open the Connected Sheet.

- Launch the JiravSync Coefficient Add-On to SalesForce* and use Pivot Mode to display the data by month in a 2nd tab.
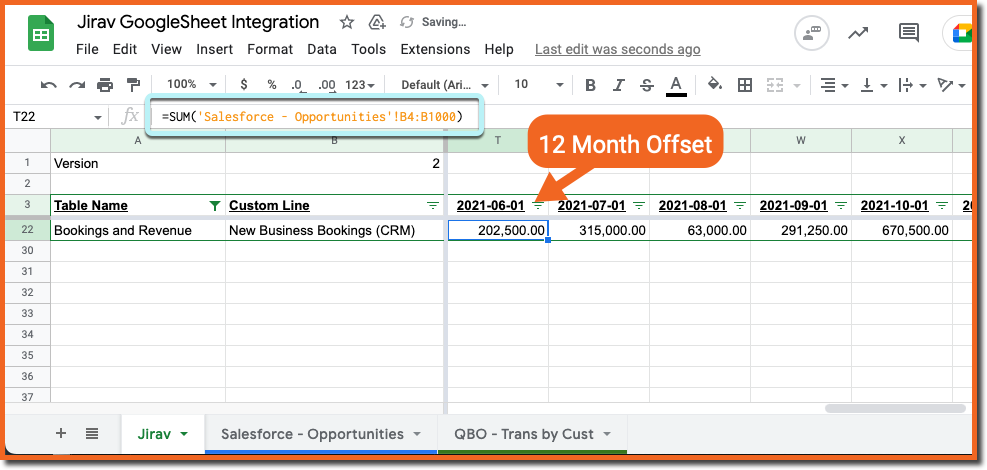
*This step should be modified as needed to link to your CRM - Create a formula in the Jirav tab to pull the data from the SalesForce - Opportunities tab using a 12-month offset, e.g., link the data from June 2022 in SalesForce tab to June 2021 in the Jirav tab. In Step 3: 2c this data will be pulled into the appropriate period using a driver.
- Go to Settings ⚙️ > Integrations and Import from the Connected GoogleSheet.

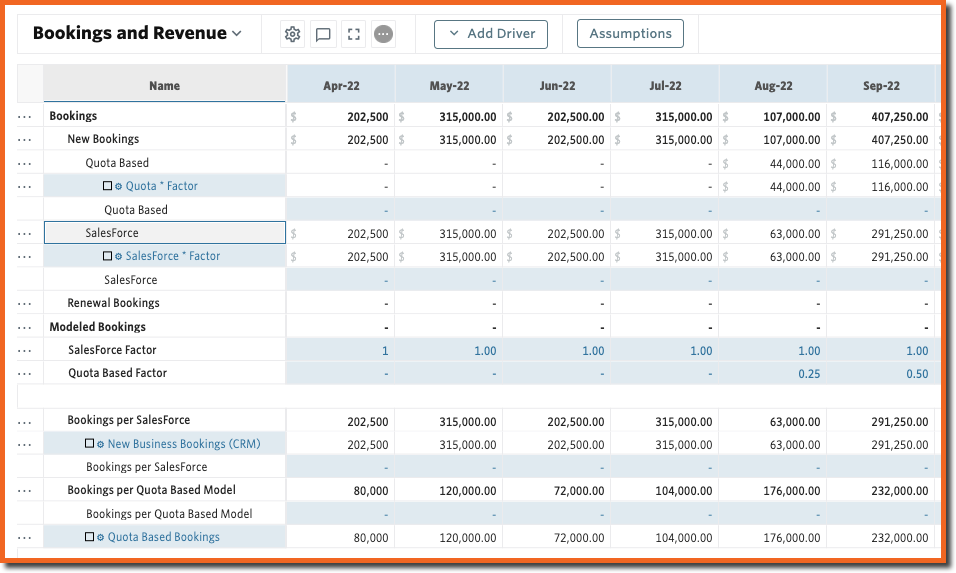
Step 3: Update the Revenue Model to Consider CRM Data
Now that the data from SalesForce has been imported to Jirav, we can update the revenue model to incorporate this data.
- Go to Setup ⚙️ > Custom Tables > Manage Tables > Select the Bookings and Revenue Custom Table. Then select + Add Line to create a new Section and New Lines similar to the below.
- Go to Plans and add Drivers to each new line as shown below:
- SalesForce
Input 1: Bookings per SalesForce
Fx: *
Input 2: SalesForce Factor - Quota Based
Input 1: Bookings per Quota Based Model
Fx: *
Input 2: Quota Based Factor - Bookings per SalesForce
Input 1: New Business Bookings (CRM)
Input 1 Range: Twelve Months Ago (-12 Months) - This is necessary because the SalesForce data was imported with a 12-month offset in Step 2
Fx: *
Input 2: Constant 1 - Bookings per Quota Based Model
Input 1: Quota Based Bookings
Fx: *
Input 2: Constant 1
- SalesForce
- Populate the Factor as desired to incorporate only the SalesForce Bookings, only the Quota Based Bookings, or a combination of both.