The Annual Budget Process includes these steps:
- Create a New Plan
- Import Actuals
- Update Drivers & Assumptions
- Update Dashboards & Reports
- Share with Collaborators
- Make the Budget a Plan of Record
Before you kick off the annual budget process, think about the following:
- How would you like to improve upon your budget process from previous years?
- Who should be included in the budget process?
- How many years do you want to budget for?
- How many months of actuals do you want to include in budgeting templates for reference?
- What KPIs are you going to use to measure success against the budget?
- What methodologies (drivers, assumptions, data input) do you want to use to budget for the next year?
☑️Step 1: Create a New Plan
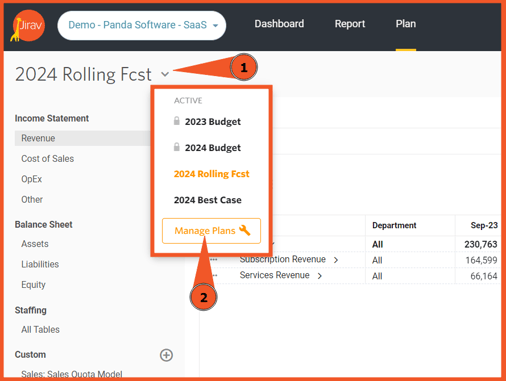
A Plan represents a specific planning scenario. A new Plan should be created as part of the annual budgeting process.- To create a new plan for the budget process, go to Plans 📈 > Select the ∨ next to the current Active Plan to open the context menu and Select Manage Plans.
Decision: Create a new blank plan or clone an existing plan as the starting point for your annual budget.

- The new Plan will be added to the Archived section. Update the Name, Actuals Period, Forecast Period & Description as desired and Save. Then, move the new plan from Archived to Active.
Decision: Specify which periods of Actuals you'd like to display in your planning templates and how many periods you'd like to budget for.
Helpful Hints:
- It is typically recommended to clone your most accurate current forecast as the basis for the annual budget.
- When you clone a plan, it is automatically created as an archived plan. To make the cloned plan active, simply click on the ellipsis located to the left of the plan and select "Make Active".
- Move any Active plans that are no longer relevant to the Archived section.
-
You can increase the number of active plans available in your account for additional scenario planning. Click here to learn more about adding additional active plans to your account.
- Additional Resources: Plan Management
☑️Step 2: Import Actuals
Historical trends can often be a key factor when projecting the future. It is important to make sure your Actual data is up to date so that any drivers referencing prior periods and staffing-related expenses calculate as expected.
Actuals data is imported from Setup ⚙️> Actuals. Imports for Accounting, Workforce & Custom data should be reviewed and reimported as needed.
Additional Resources: Actuals and Jirav, Import your Workforce, Import Custom Table Actuals from GoogleSheet or Excel
☑️Step 3: Update Drivers and Assumptions
Drivers and Assumptions are used to formulaically project values in the future. Be sure to make sure Drivers are applied to all relevant accounts and that Assumptions are updated for the new year.
Drivers
Plan Drivers are managed from either the planning tables or the Drivers' area within the plan. A Driver is a formulaic expression used to forecast the value of an account. Each Driver has a Start & End Date and multiple drivers can be used to forecast the same account as they are additive in nature.
A quick check to verify P&L Drivers have been appropriately applied is to view each area of the P&L, i.e., Revenue, COGS, OpEx, and Other, and identify any "gaps" in the budget. Gaps can occur if a new account and/or department has been added since the previous budget was planned for. For example, in the screenshot below, we can see that most of the Payroll-related costs have been budgeted for the S&M Department, but there is a gap in the budget for the Commission.
Fill these gaps by creating new Drivers, Sub-Items and/or inviting Collaborators to input their budgets.
Drivers can also be reviewed from the Drivers area within the Plan. The Drivers tab includes all Drivers across the current plan for both the P&L and Balance Sheet.

Assumptions
Assumptions can be reviewed from the Assumptions area within the Plan. Assumptions are variables referenced by Drivers. For example, you might have an Assumption for Benefits per Headcount and a Driver that multiplies that Assumption by Cumulative Headcount.
These Assumptions should be updated to reflect the current budget targets.

Additional Resources: Plan Drivers, Introduction to Assumptions, Drivers & Sub-Items
☑️Step 4: Update Dashboards and Reports
Now that you have a new Budget, Reports & Dashboards displaying Budget vs Actuals should be updated.
Dashboards
Edit tiles referencing budget data and update the data source to point to the new budget plan created in Step 1 as well as the Range as needed. 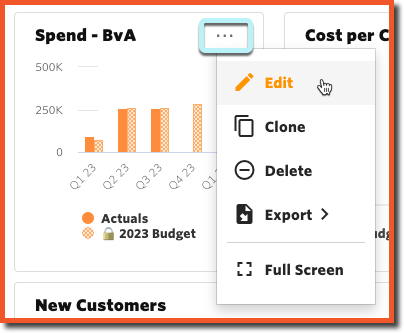
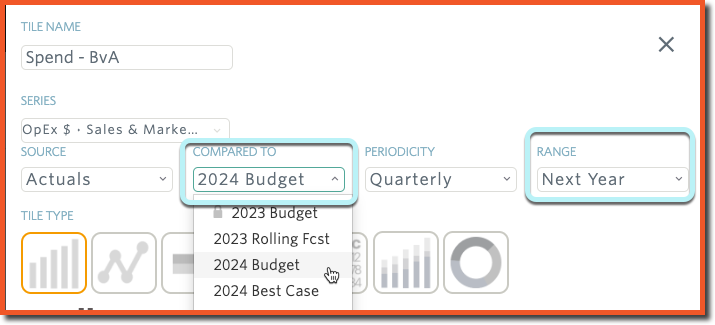
Helpful Hint:
Edit Tile Sources and Ranges in bulk from the Edit Dashboard module.

Additional Resource: Dashboard & Tile Overview
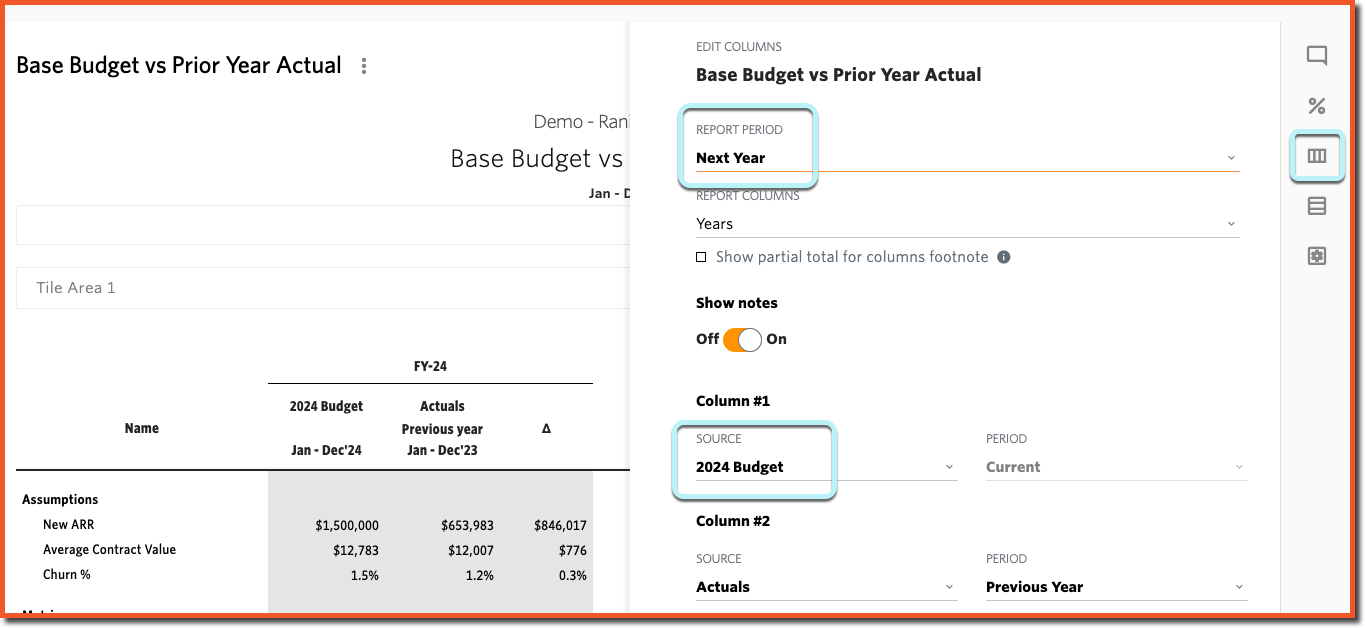
Reports
Edit Columns on reports referencing budget data and update the data source to point to the new budget plan created in Step 1 as well as the Range as needed.
☑️Step 5: Share with Collaborators
Collaboration is used to invite key stakeholders into the budget plan to input the specific items they are responsible for, for example, new hires for their department or the bookings forecast.
To share a specific portion of the budget, navigate to Plans and select the Share button.

Select the Custom Plan Access option to share a specific table or tables.
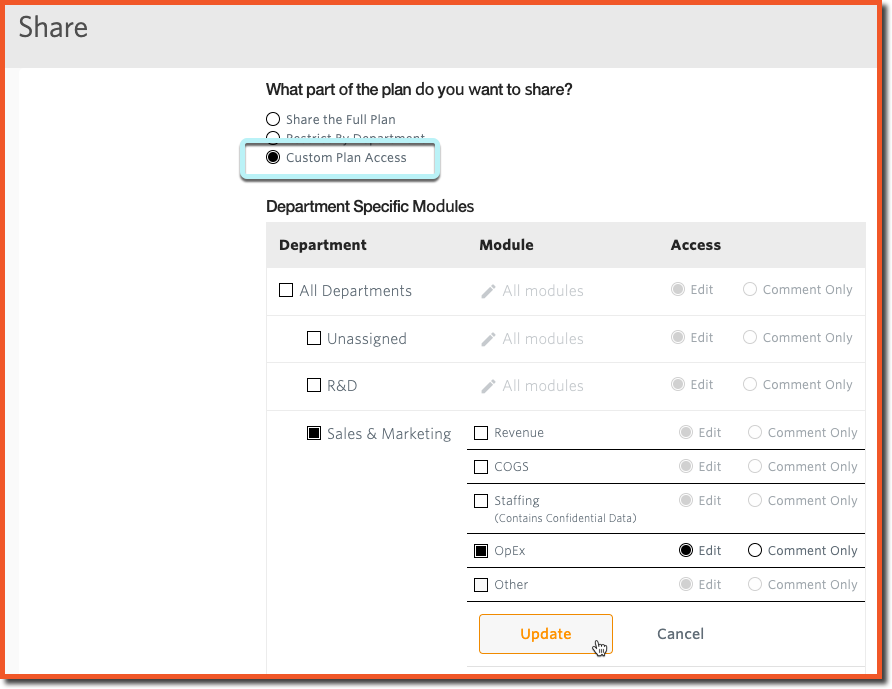 Audit who has entered their budget from Plan Share Management.
Additional Resource: Collaboration Overview
☑️Step 6: Make the Budget a Plan of Record
A Plan of Record is a read-only plan that is permanently locked for reference purposes. Typically the Annual Budget is made a Plan of Record so that Actuals can be reported against it throughout the year. The PoR provides you with confidence in your reporting as the detail in the PoR is exactly the way it was when it was approved. The POR can later be cloned when you are ready to start your next rolling forecast.
Once the budget is finalized, designate it as a Plan of Record from Plans > Manage Plans.

Additional Resource: Plan of Record Overview